
Smart Home Prewiring for New Builds in Ontario: A Planning Guide
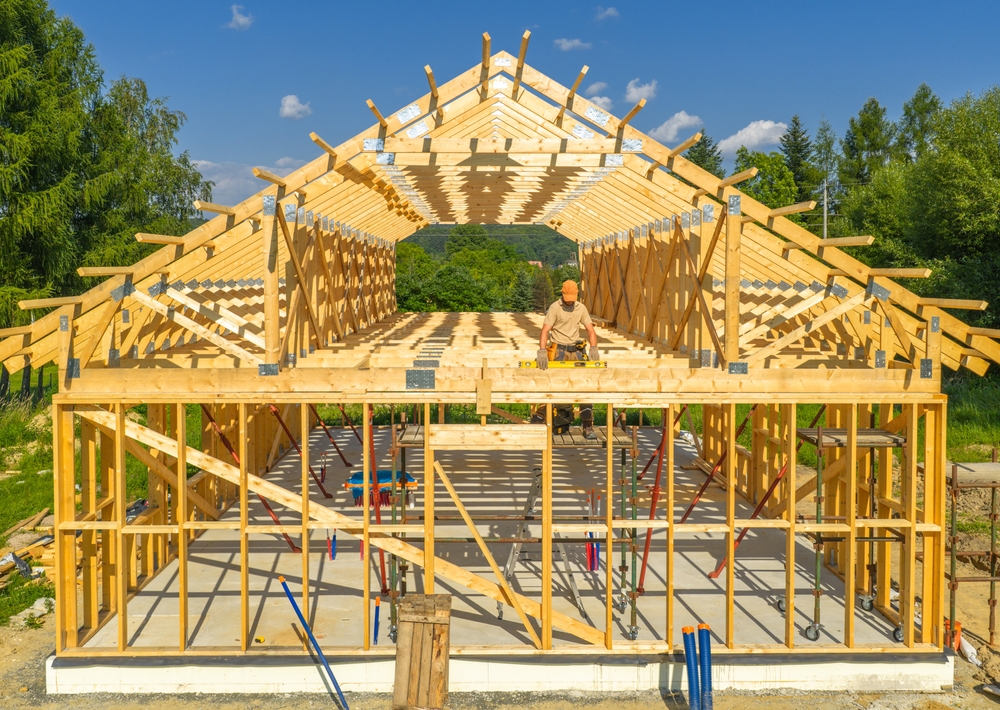
If you’re building or renovating in Ontario, prewire for smart-home tech at the rough-in stage — before the drywall goes up. That means running structured cabling (Cat6A) to key locations, pulling conduit and pull-strings for the future, and planning camera, WiFi, speaker, shade, and panel locations now. Wire is cheap while the walls are open. It gets expensive the day they close.
Here’s the honest version of what to run, why the timing matters so much, and how to coordinate it with your builder and electrician without stepping on anyone’s toes.
Why prewire before drywall instead of retrofitting later?
The whole argument comes down to access. During rough-in, your walls are open studs. A cable run to an upstairs bedroom is a few minutes and a few dollars of Cat6A. After the drywall, tape, mud, primer, and paint are done, that same run means fishing walls, cutting holes, patching, and repainting — or giving up and going wireless where wireless doesn’t belong.
Retrofitting isn’t impossible. It’s just slower, messier, and far more expensive per drop, and some runs (across a finished ceiling, into a solid-poured basement, up an insulated exterior wall) become genuinely painful. The cost of waiting isn’t only money — it’s the options you quietly lose because pulling that wire later stopped being worth it.
The smart move is to separate wiring from equipment. You do not need to buy cameras, speakers, or a Control4 controller during construction. You just need the wire and conduit in the walls so the equipment can go in whenever your budget and priorities line up. Wire now, gear later.
What should you wire before the drywall goes up?
Think in terms of systems, not gadgets. You’re building a nervous system for the house so it can support whatever technology you (or the next owner) want over the next 15 to 20 years.
The backbone is structured cabling — home runs of Cat6A from a central network location out to every spot that might ever need data, control, or a camera. “Home run” means each cable goes back to one place rather than daisy-chaining. Add conduit and pull-strings to the places that are hard to reach later, so you can pull new cable in the future without opening a wall. That single habit is what keeps a house from going obsolete.
Below is a room-by-room checklist you can hand to your builder.
Prewire before drywall: room-by-room checklist
Use this as a starting point and adjust to your floor plan. Every drop is a home run back to the network closet unless noted.
Network closet / rack (the hub)
- Dedicated location (basement, utility room, or a deep closet) with ventilation and a power outlet or two
- Small wall-mount rack or backboard for the modem, switch, and future gear
- All home-run cables terminate here
- Conduit from the closet to the attic and to the basement for future expansion
Living room / main TV wall
- 2x Cat6A behind the TV (streaming, control, future use)
- Conduit from TV height to the floor or media cabinet for HDMI/power later
- In-wall/in-ceiling speaker runs if you want built-in audio
- Cat6A to the media cabinet location
Kitchen
- 1x Cat6A for a control keypad or under-cabinet tablet
- In-ceiling speaker runs for background audio
Primary bedroom
- 2x Cat6A (one for AV, one spare)
- Shade wiring plus a nearby power source at each window head for motorized shades
- Keypad location by the door and/or bedside
Each additional bedroom / office
- 1–2x Cat6A per room (offices lean toward 2)
- Speaker runs if the room is on your audio plan
Ceilings / hallways (WiFi)
- Cat6A to planned wireless access-point locations — ceiling-mounted, roughly central to each floor
- Plan one AP per floor as a baseline; larger or multi-level homes need more
Exterior (cameras + doorbell)
- Cat6A camera drops to each planned camera location (corners, driveway, entries)
- Cat6A or dedicated wiring to the front door for a wired video doorbell/intercom
- Runs to soffits and eaves while they’re open
Whole-house infrastructure
- Extra power outlets at the rack, at TV locations, and at shade window heads
- Conduit/pull-string to any location that’s difficult to reach after finishing
- Home run for any wall panel or master keypad location
A quick reference on where the common systems land:
| System | Wire before drywall | Why it’s hard to add later |
|---|---|---|
| Wired cameras | Cat6A to each camera spot | Fishing exterior/soffit runs post-build is invasive |
| WiFi access points | Cat6A to ceiling AP locations | Ceiling runs mean patching and repainting |
| In-wall / in-ceiling audio | Speaker cable to each location | Can’t open finished ceilings cleanly |
| Motorized shades | Low-voltage + power at window heads | Window trim and drywall block access |
| Control keypads / panels | Cat6A home run to each spot | Wall opening + patch for every keypad |
| Future-proofing | Empty conduit + pull-string | No conduit means opening walls to add anything |
How do you coordinate this with your builder and electrician?
Timing is everything, and the window is rough-in — after framing, plumbing, and HVAC are roughed but before insulation and drywall. That’s when someone needs to pull low-voltage cable.
A few things to sort out early:
Who runs the low-voltage? In Ontario, line-voltage electrical is done by a licensed electrical contractor. Low-voltage/structured cabling is often a separate trade — sometimes your electrician does it, sometimes a dedicated integrator does it, sometimes it’s split. Decide this before rough-in so there’s no gap where nobody pulls the wire.
Get a wiring plan on paper. Mark every drop, camera, AP, keypad, speaker, and the network closet on the floor plan. This drawing is what keeps the electrician, the builder, and you aligned, and it’s what a future tech uses to find anything. Verbal instructions on a job site get lost.
Confirm the schedule. Ask your builder for the rough-in date and make sure whoever’s pulling cable is booked for that window. Miss it and you’re into retrofit territory.
If you want that plan built with you, our home automation and prewiring team can produce the wiring drawings and coordinate with your builder at rough-in.
Honest tradeoffs: you don’t have to wire everything
Here’s what a lot of integrators won’t say plainly: prewiring is not all-or-nothing, and you don’t need every drop on this list.
The principle is that pulling wire and conduit now preserves your options cheaply, and the equipment can come later. A single spare Cat6A and an empty conduit to a room costs very little at rough-in. It’s insurance against a decision you haven’t made yet. Skipping it is the expensive choice, because adding it later is the pricey part.
When minimal prewire is fine. A small renovation — one room, a bathroom, a kitchen refresh — usually doesn’t justify a full structured-wiring plan. Run a couple of Cat6A drops to the obvious spots, add a pull-string if a wall is already open, and stop there. If your home is otherwise finished and you’re not touching it, good WiFi and well-placed wireless devices cover a lot of ground.
When full prewire earns its keep. A custom build or a full gut renovation is exactly when to do the complete plan. You’re already paying for open walls; the marginal cost of doing it right is at its lowest it will ever be. This is also the moment to think about whole-home audio, motorized shades, and a proper camera layout, because retrofitting any of those later is where the real money goes.
There’s no shame in wiring for future systems and installing them in phases. That’s the normal, sensible path.
Frequently asked questions
What is smart home prewiring?
Smart home prewiring is running the cabling and conduit for future technology — data, cameras, WiFi, audio, shades, and control — while the walls are open at rough-in. You install the wire and the pathways now, then add the actual equipment whenever you’re ready. It’s the infrastructure step that makes everything else easier and cheaper later.
What cable should I use for a new-build smart home?
Cat6A is the sensible default for data and camera runs today — it handles high-speed networking and power-over-Ethernet for cameras and access points. Pair every important run with an empty conduit and pull-string so you can upgrade to whatever comes next without opening walls. Speaker and shade wiring are separate low-voltage runs planned alongside the data cabling.
Do I need to buy all the equipment before drywall?
No. Separate the wiring from the gear. You only need the cable and conduit in the walls before drywall; cameras, speakers, controllers, and keypads can be installed months or years later. Wiring now is what keeps those choices open and low-cost — the equipment is a separate budget on its own timeline.
How much does smart home prewiring cost in Ontario?
Prewiring is priced by scope — the size of the home, how many drops you run, the number of camera, AP, and keypad locations, and how much conduit and pull-string you include for the future. Rather than a headline number that won’t match your plan, the honest answer is that the cost of prewiring at rough-in is a fraction of retrofitting the same runs later, and a consultation gives you a real figure for your specific floor plan. For how the finished-system side of the budget works, see our guide on what Control4 costs in Canada.
Can I add smart home wiring after the house is finished?
Yes, but it’s the expensive, disruptive path. Retrofitting means fishing walls, cutting and patching drywall, and repainting — and some runs across finished ceilings or into poured basements are genuinely difficult. This is exactly why running conduit and pull-strings during construction is worth it: it lets you add wiring later without opening a single wall.
Who runs the low-voltage cabling — the electrician or an integrator?
It varies by project. Line-voltage electrical work is done by a licensed electrical contractor, while low-voltage structured cabling is often handled by a dedicated integrator or a low-voltage trade. The important thing is to decide who owns it before rough-in, so the wire actually gets pulled during the open-wall window.
When you’re ready to turn the checklist into real drawings, our home automation and prewiring services can plan the runs, mark the panel and camera locations, and coordinate with your electrician on timing.
Ready to plan your project?
Tell us what you want to build, fix or upgrade — a Techspirit Solutions specialist will help.